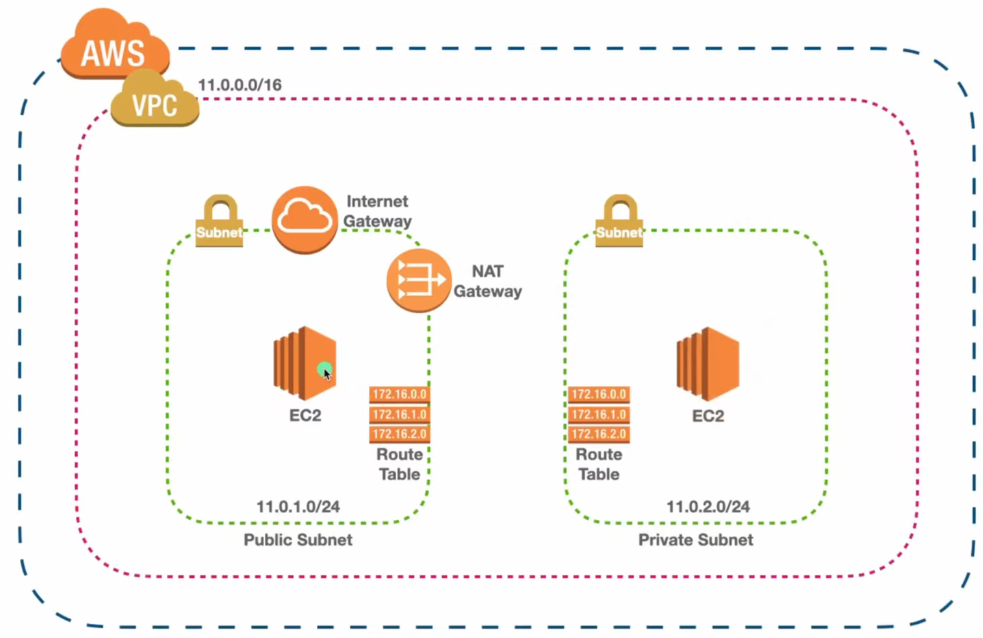
✅ VPC Setup with Public & Private Subnets, NAT Gateway, and IGW
🔧 VPC & Subnet Creation
- Create a VPC
- CIDR block: 11.0.0.0/16
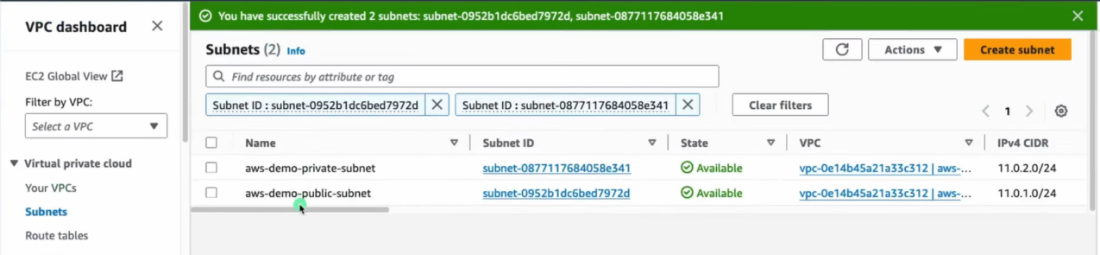
- Create Subnets
- Public Subnet: 11.0.1.0/24
- Private Subnet: 11.0.2.0/24
- Ensure subnets are in the same Availability Zone as the NAT Gateway (for simplicity)
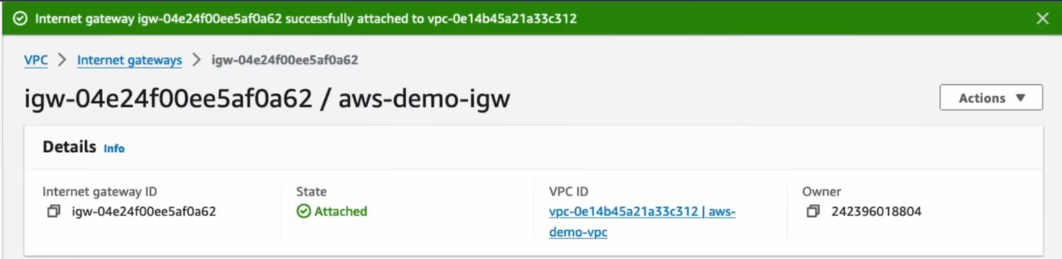
🌐 Create and Attach Internet Gateway (IGW)
- Create IGW
- Attach the IGW to your VPC
- Required for public resources to access the internet
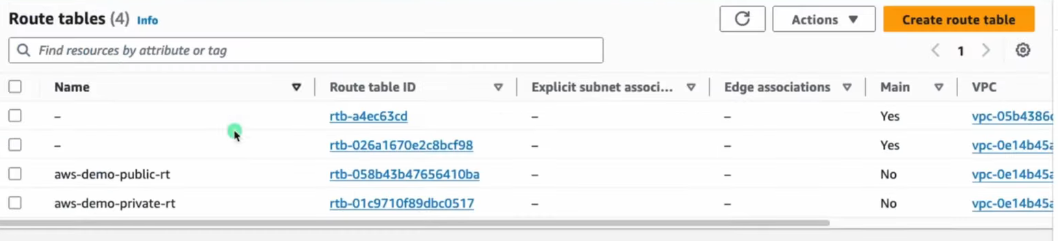
📜 Create and Associate Route Tables
- Create 2 Route Tables
- One for Public Subnet
- One for Private Subnet
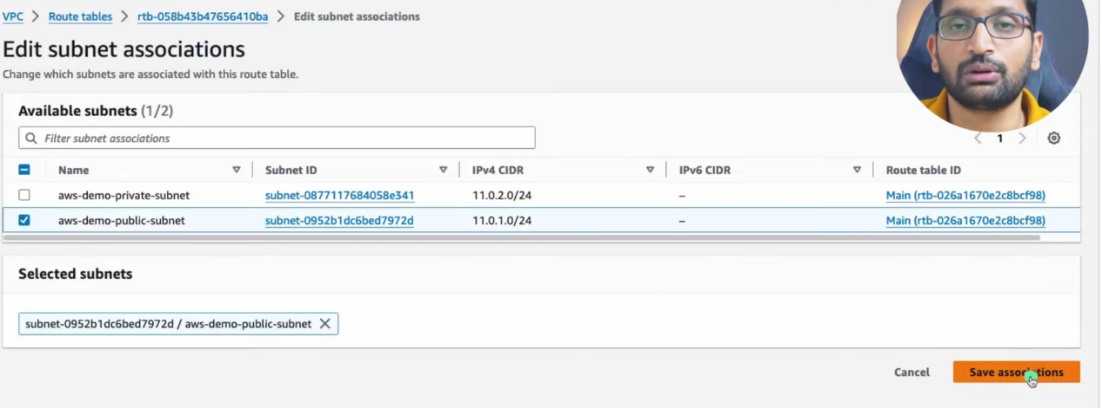
- Associate Route Tables to Subnets
- Public Route Table → Public Subnet
- Private Route Table → Private Subnet
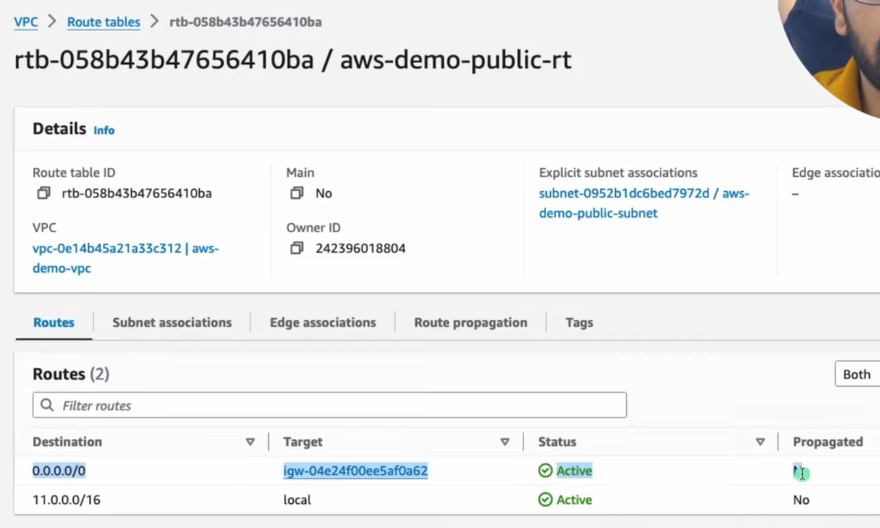
🌍 Update Public Route Table
- Add route to public route table:
- Destination: 0.0.0.0/0
- Target: Internet Gateway
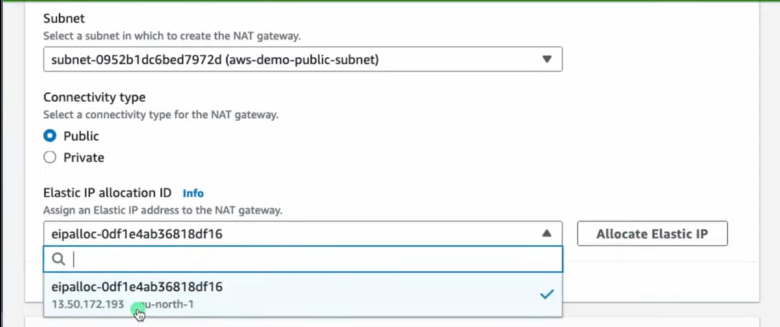
⚙️ Create and Configure NAT Gateway
- Create NAT Gateway
- Must be in Public Subnet
- Requires Elastic IP
- NAT Gateway is used by private instances for outbound internet access

Important Notes
- NAT Gateway is not used for inbound traffic
- It is expensive (hourly + data usage)
- It allows private subnet to reach internet for updates, downloads, etc.
- Acts as Proxy for Private EC2 instance
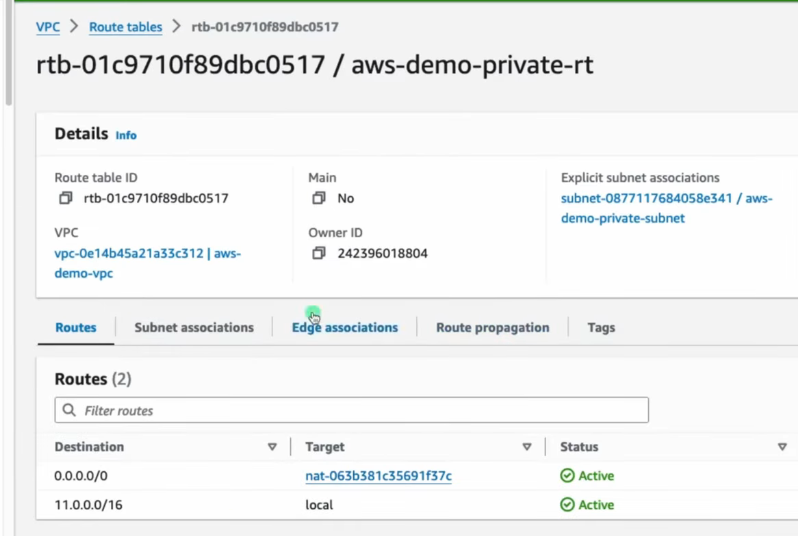
📦 Update Private Route Table
- Add route to private route table:
- Destination: 0.0.0.0/0
- Target: NAT Gateway
🖥️ Launch EC2 Instances
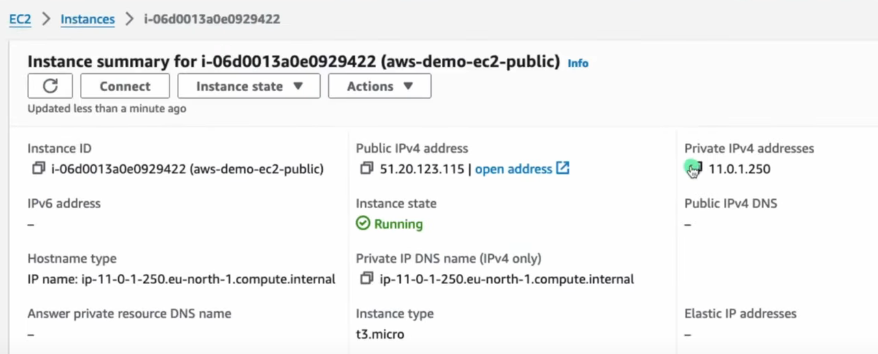
- Launch Public EC2 Instance
- Subnet: Public
- Auto-assign Public IP: ✅ Yes
- Launch Private EC2 Instance
- Subnet: Private
- Auto-assign Public IP: ❌ No

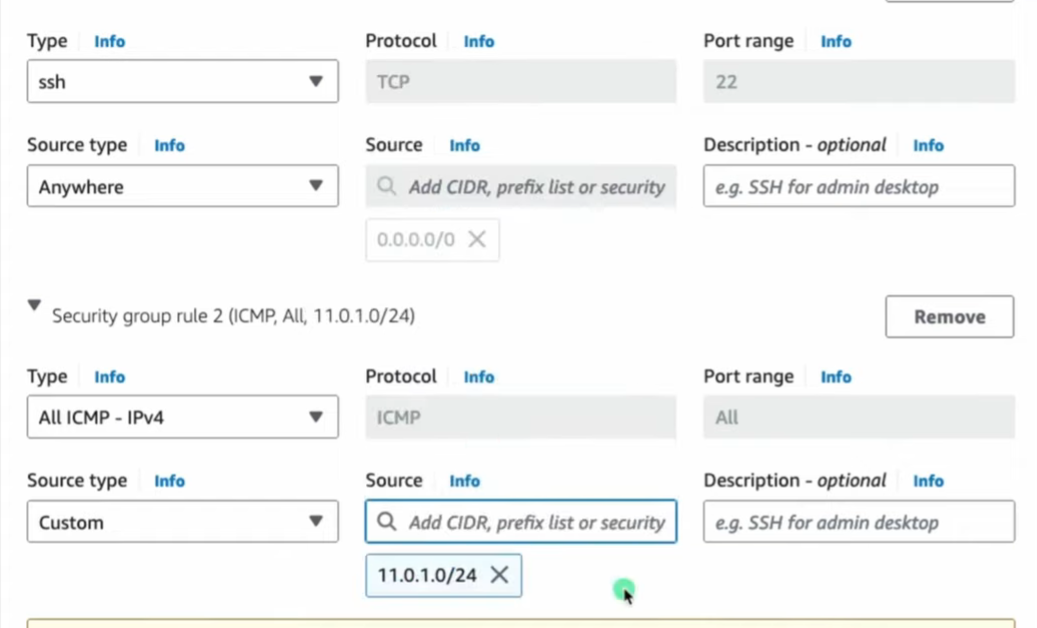
🔐 Security Groups Configuration
- Public EC2 SG
- Inbound: Allow SSH (port 22) from your IP address
- Private EC2 SG
- Inbound: Allow SSH from Public EC2’s private IP or CIDR 11.0.1.0/24
Tip
Follow the Principle of Least Privilege — allow only what’s needed
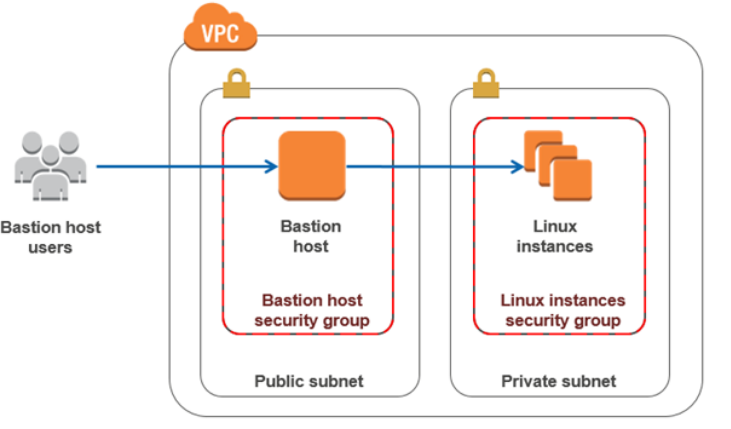
🔗 SSH into Private EC2
- SSH into Public EC2 from your local machine:
- Use the public IP and .pem key
-
SSH into Private EC2 from inside Public EC2:
- Use private IP of the private EC2 and the same .pem key
-
This is known as a Bastion Host (Jump Box) setup
-
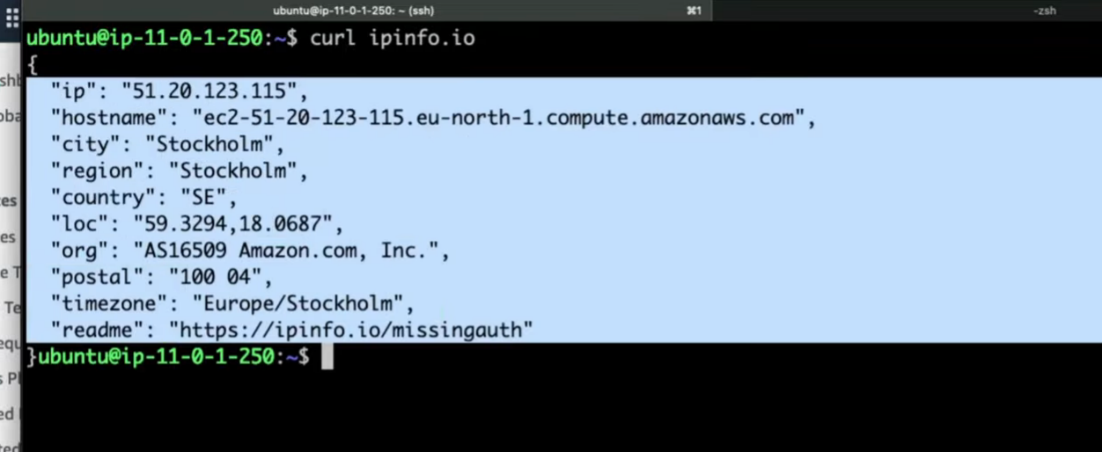
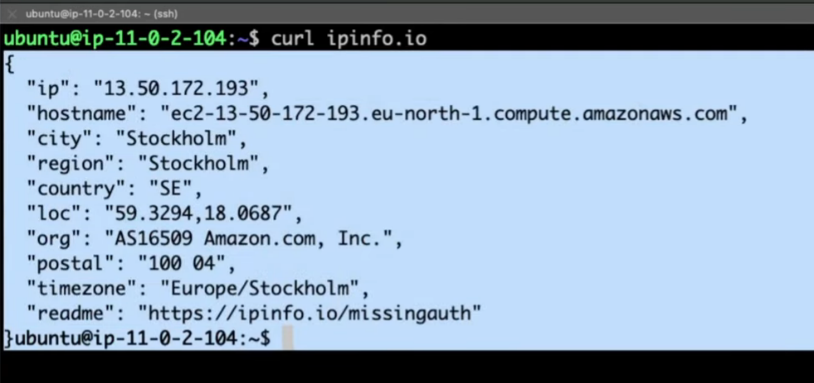
Run:
curl ipinfo.io- It shows the Elastic IP of the NAT Gateway, confirming NAT works

IMP: EC2 stays private (Uses NAT IP Proof)
🌐 Internet Access Behavior
- Public EC2
- Has both private and public IP
- Uses IGW for internet access
- Private EC2
- Has only private IP
- Uses NAT Gateway in public subnet for outbound-only internet access
- Cannot be reached from internet directly
🔁 IGW vs NAT Gateway
| Feature | Internet Gateway (IGW) | NAT Gateway (NAT GW) |
|---|---|---|
| Used | In Public Subnets | Private Subnets |
| Internet Access | Inbound + Outbound | Outbound only |
| IP Needed | No | Yes (Elastic IP) |
| Cost | Free | Paid |
| Accept Incoming Conn. | Yes | No |
| Public IP Req. | EC2 needs Public IP | EC2 stays private (uses NAT IP) |
🧠 Must-Know Concepts
- Elastic IP
- A static public IP in AWS, used with NAT Gateways or EC2
- Bastion Host (Jump Server)
- Public instance used to SSH into private instances
- Security Group vs NACL
- SG is stateful (response traffic allowed automatically)
- NACL is stateless (explicit rules for both inbound and outbound)
⚠️ Best Practices
Warning
- Avoid giving private EC2 a public IP
- Restrict SSH access using security groups
- Monitor NAT Gateway usage to manage costs
- Use NAT Instance (EC2-based) for cheaper alternative (but less scalable)